
Beginner’s Guide to Solo Mindful Travel: Your First Trip Alone
There’s a moment on every solo trip — usually somewhere between landing and finding your accommodation — when it hits you: no one is waiting for you to catch up. No one else’s itinerary to negotiate. Just you, a new place, and however you choose to move through it.
That moment can feel thrilling. It can also feel terrifying. For most first-time solo travelers, it’s honestly both.
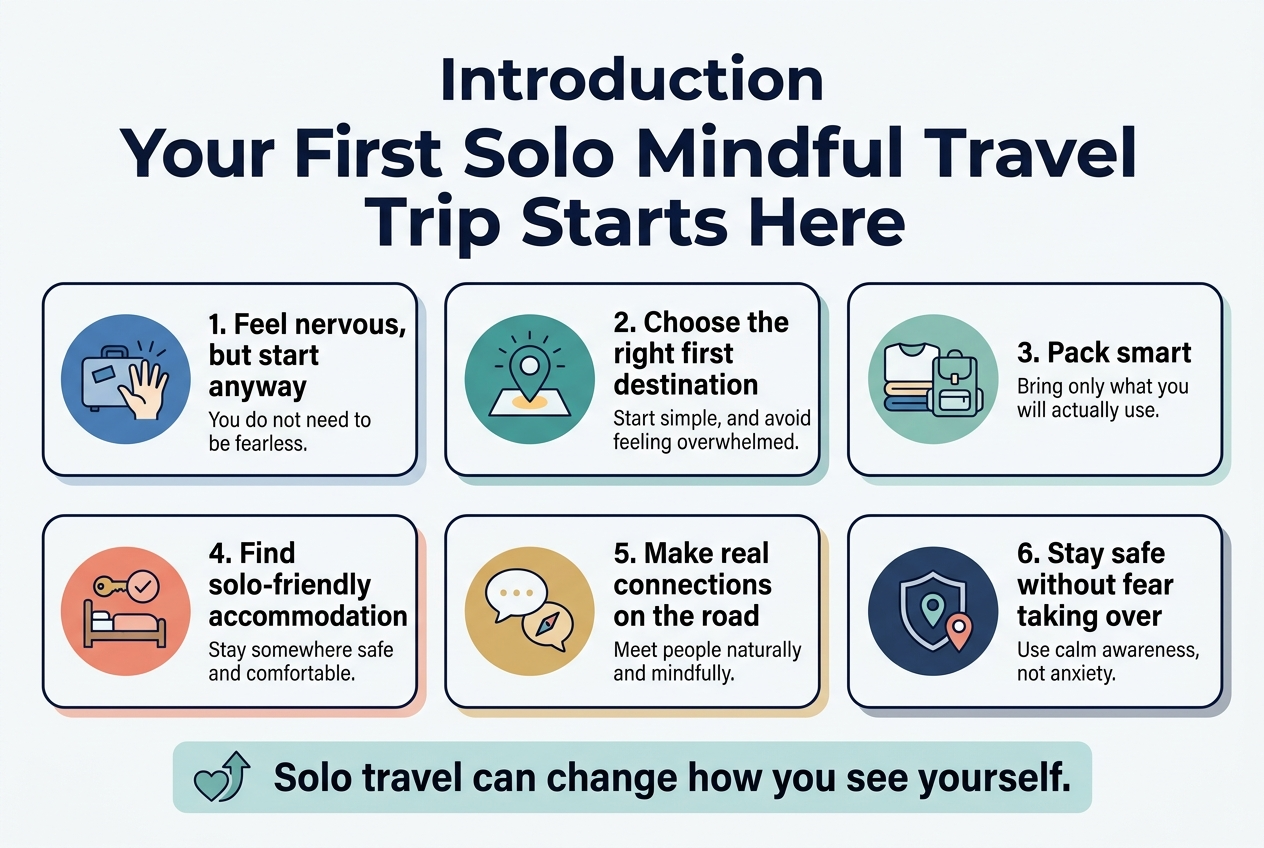
If you’ve been circling the idea of a solo trip but haven’t taken the leap, this is your gentle push — and a practical guide to doing it in a way that feels grounded rather than overwhelming.
Why Travel Alone, Even Once
Solo travel has a way of returning you to yourself. Without anyone else’s preferences to accommodate, you start noticing your own — what pace you actually like to walk at, what kind of mornings you crave, how long you genuinely want to linger in a museum before your mind wanders elsewhere.
It also builds a quiet, durable kind of confidence. Navigating an unfamiliar train system or ordering a meal in a language you don’t speak might feel small in the moment, but it adds up to a real sense of “I can handle things.” That confidence tends to follow you home.
Solo travel changed how I see myself. I think it can do the same for you.
Why Solo Mindful Travel Transforms Your Life
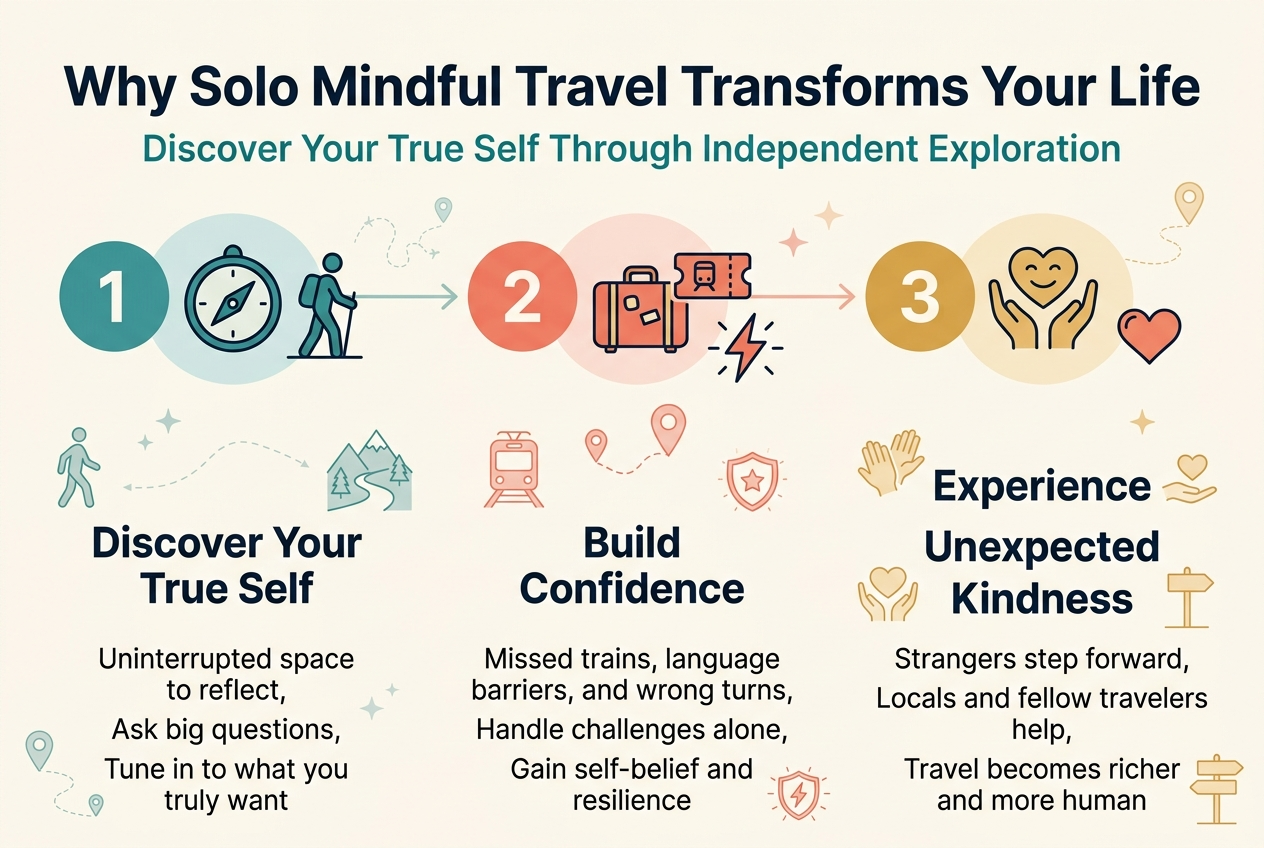
Discover Your True Self Through Independent Exploration
When I travel alone, I get something no group trip can offer — uninterrupted space to reflect. Without anyone else’s mood, plans, or conversation pulling at my attention, I can finally tune in to what I truly want. Solo travel has taught me to ask the big questions and actually sit with the answers. I’ve done this twice, and each time, I came back changed.
Build Confidence by Overcoming Real Challenges Alone
Every missed train, language barrier, and wrong turn I’ve navigated alone has added to my confidence in ways I never expected. When I handle these challenges without anyone else’s help, I discover capabilities I didn’t know I had. The moment I resolved my first real travel crisis solo, I felt genuinely invincible. With this in mind, I can say that overcoming real obstacles alone builds a self-belief no comfort zone ever could.
Experience the Unexpected Kindness of Strangers
Now that I’ve pushed past my fears and traveled solo, one thing continues to move me deeply — the generosity of strangers. When things go wrong on the road, someone always steps forward. Locals, fellow travelers, and passing strangers have enriched my journey in ways I never anticipated when traveling in a group.
Building Your Solo Travel Confidence Step by Step
Building Your Solo Travel Confidence Step by Step
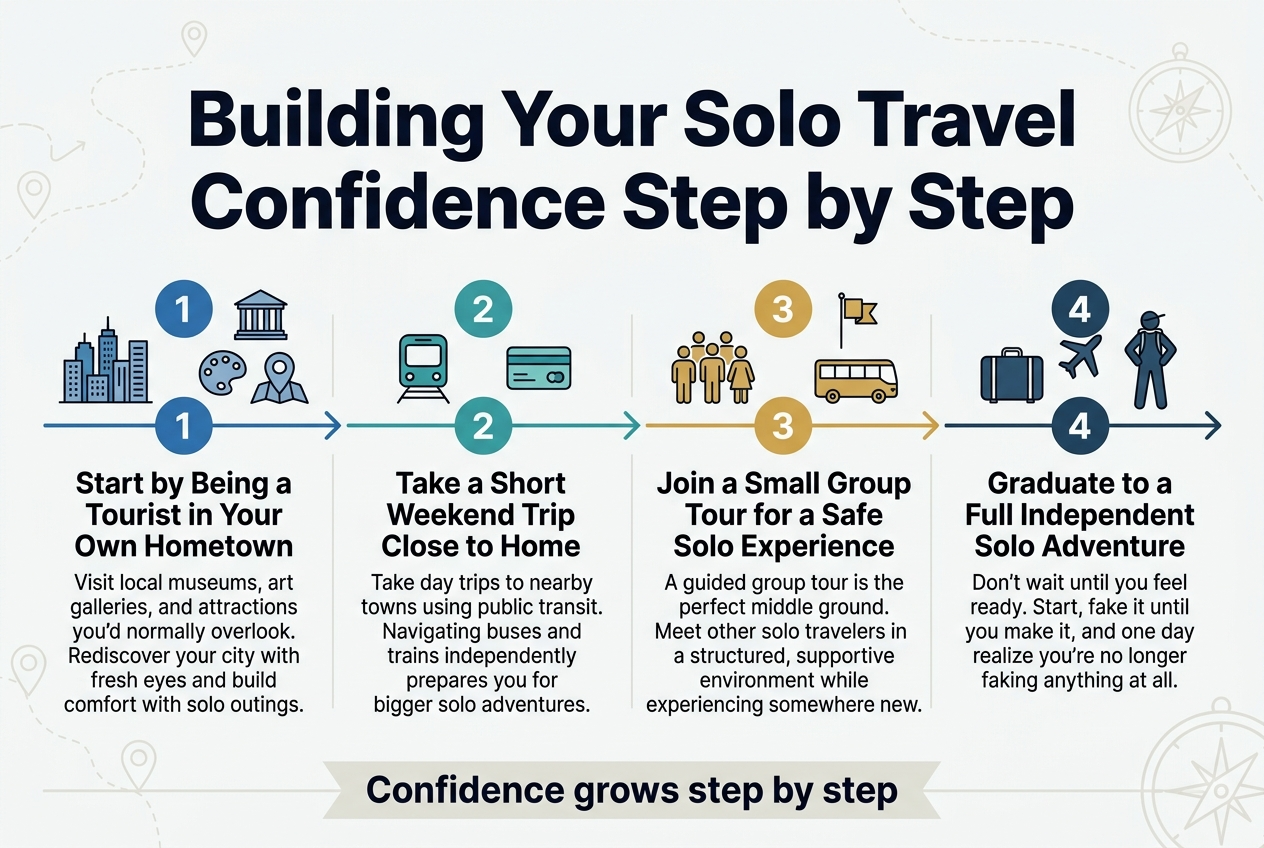
Start by Being a Tourist in Your Own Hometown
I always recommend starting before the plane even takes off. I visit local museums, art galleries, and attractions I’d normally overlook — rediscovering my city with fresh eyes builds genuine comfort with solo outings.
Take a Short Weekend Trip Close to Home
With that foundation in place, I take day trips to nearby towns using public transit. Navigating buses and trains independently is a game-changer — it directly prepares me for bigger solo adventures without overwhelming pressure.
Join a Small Group Tour for a Safe Solo Experience
Now that I’m comfortable moving independently nearby, a guided group tour offers the perfect middle ground. I get to meet other solo travelers in a structured, supportive environment while still experiencing somewhere new. It removes the intimidation of planning everything alone while building real confidence.
Graduate to a Full Independent Solo Adventure
With this in mind, I’m finally ready to take the leap into full independence. The key insight I’ve learned is: don’t wait until you feel ready — that day rarely comes naturally. I simply start, fake it until I make it, and one day realize I’m no longer faking anything at all.
Choosing the Right Destination for Your First Solo Trip
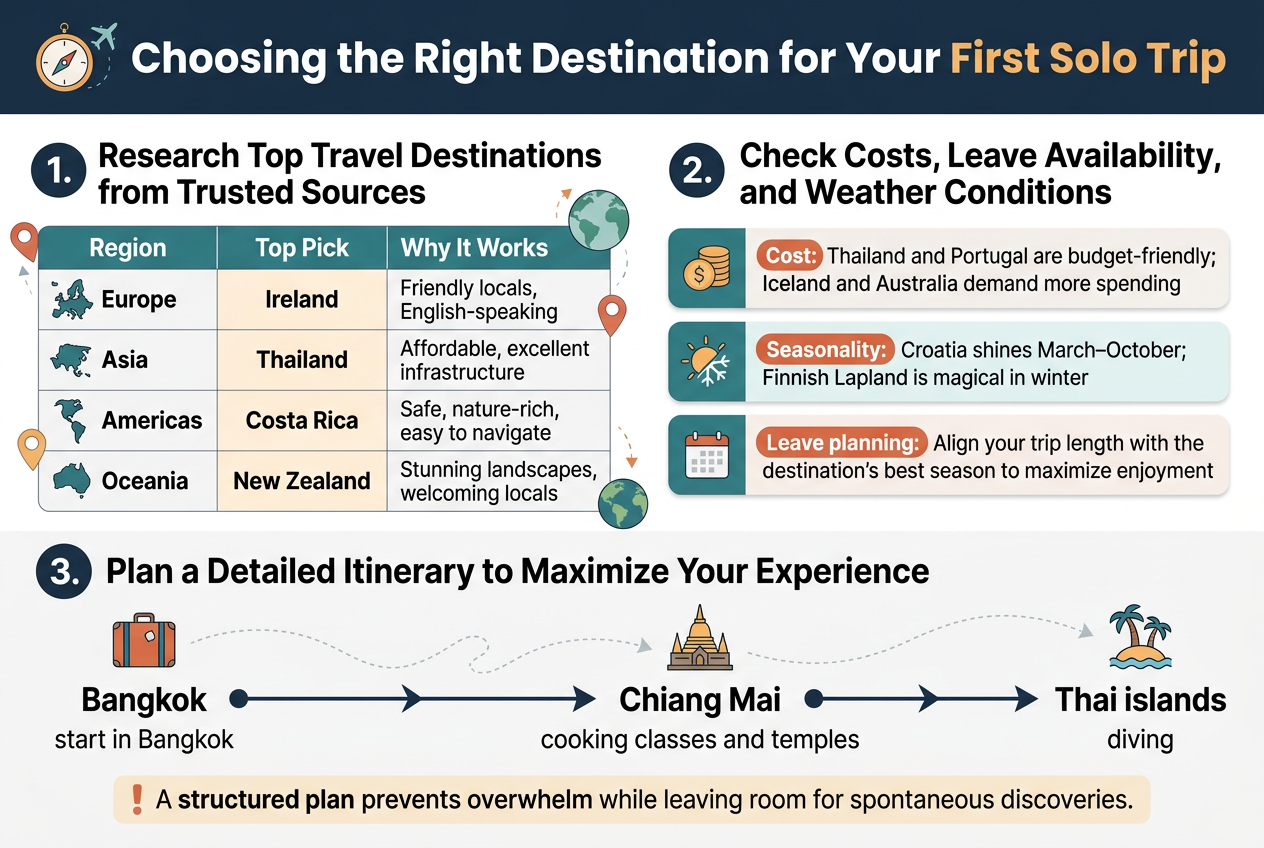
A. Research Top Travel Destinations from Trusted Sources
I always start by consulting trusted travel resources before committing to a destination. Based on my experience, the best first-time solo destinations include:
| Region | Top Pick | Why It Works |
|---|---|---|
| Europe | Ireland | Friendly locals, English-speaking |
| Asia | Thailand | Affordable, excellent infrastructure |
| Americas | Costa Rica | Safe, nature-rich, easy to navigate |
| Oceania | New Zealand | Stunning landscapes, welcoming locals |
B. Check Costs, Leave Availability, and Weather Conditions
Now that we’ve covered destination research, I factor in three practical elements before booking:
- Cost: Thailand and Portugal are budget-friendly; Iceland and Australia demand more spending
- Seasonality: Croatia shines March–October; Finnish Lapland is magical in winter
- Leave planning: I align my trip length with the destination’s best season to maximize enjoyment
C. Plan a Detailed Itinerary to Maximize Your Experience
With costs and timing confirmed, I build a flexible day-by-day itinerary. For example, in Thailand, I’d start in Bangkok, head north to Chiang Mai for cooking classes and temples, then travel south to the islands for diving. A structured plan prevents overwhelm while leaving room for spontaneous discoveries.
Packing Smart for a Stress-Free Solo Journey
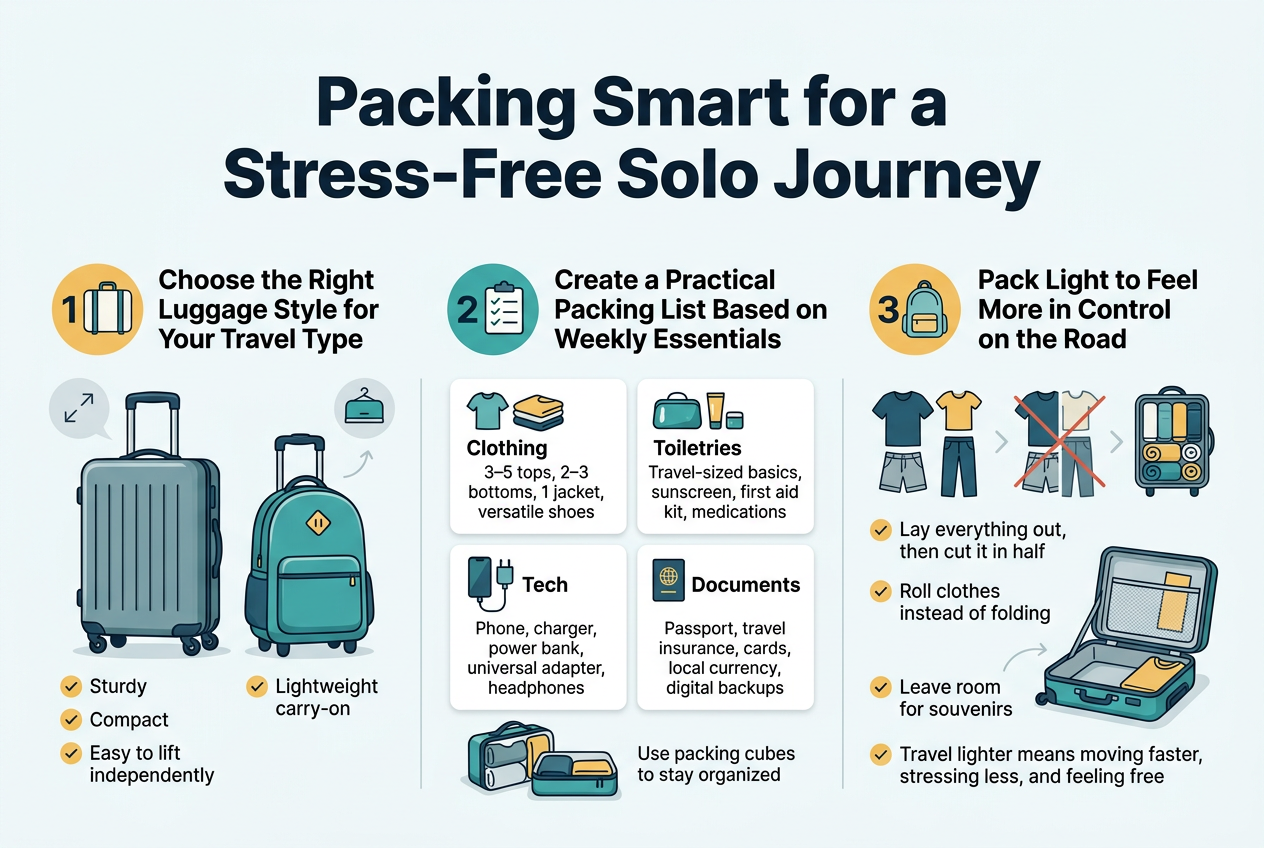
Choose the Right Luggage Style for Your Travel Type
My first packing lesson? Your bag is your plus-one — choose wisely. I recommend a medium hard-shell suitcase or a lightweight carry-on backpack with wheels. It should be sturdy, compact, and easy to lift independently, since no one else is loading it into the overhead bin for you.
Create a Practical Packing List Based on Your Weekly Essentials
Now that we’ve covered luggage, I build my packing list around daily essentials, not hypotheticals. I organize it into clear categories:
- Clothing: 3–5 tops, 2–3 bottoms, 1 jacket, versatile shoes
- Toiletries: Travel-sized basics, sunscreen, first aid kit, medications
- Tech: Phone, charger, power bank, universal adapter, headphones
- Documents: Passport, travel insurance, cards, local currency, digital backups
I also use packing cubes to keep everything organized and avoid morning chaos.
Pack Light to Feel More in Control on the Road
Previously, I overpacked — and I paid for it. Now I lay everything out, then cut it in half. I roll clothes instead of folding them to maximize space and reduce wrinkles. I also leave deliberate room for souvenirs. Traveling lighter means moving faster, stressing less, and feeling genuinely free.
Finding the Best Accommodation for Solo Travelers
Why Hostels Are the Top Choice for Solo Adventurers
After building confidence and choosing my destination, my next priority is finding the right place to stay. Hostels consistently stand out as my top recommendation for solo travelers. They’re inexpensive, social, and almost always centrally located. What I appreciate most is the built-in community—meeting fellow travelers happens naturally.
Hostels come in every style:
- Women-only or mixed dorms
- Private rooms for when I need personal space
- Party hostels or quiet, family-friendly options
I always read reviews carefully to match the hostel’s vibe with what I’m seeking.
Use Booking Platforms to Find Deals and Reserve Your Spot
With this in mind, I rely on Booking.com to compare hostels and hotels. Its verified guest reviews and detailed property information help me decide with confidence. I specifically filter by solo traveler ratings and sort reviews by date to catch any recent issues.
Keep Your Belongings Safe Without Sacrificing the Social Experience
Previously, I worried that prioritizing safety meant missing out socially — but hostels solve this beautifully. Nearly all hostels provide lockers, letting me secure valuables while freely joining communal activities. I simply:
- Store my passport, electronics, and cash in the locker
- Carry only what I need daily
- Engage openly in shared kitchens and common areas
Making Meaningful Connections While Traveling Alone
A. Approach Locals and Fellow Travelers with an Open Mindset
Solo travel doesn’t mean solitude. I discovered that simply being present — putting my phone down, observing my surroundings, and staying open — naturally invited conversations with locals and fellow travelers I never would have met otherwise.
B. Join Group Activities and Day Tours to Meet Like-Minded People
Not all group activities are equally effective for making connections. From my experience, the best options are:
- Cooking classes – Pairing up to prepare dishes creates natural collaboration and conversation
- Wine tastings – As drinks flow, friendships form effortlessly
- Collaborative experiences – Activities requiring interaction consistently outlast passive tours for building real bonds
I’ve bonded with others on 100% of my group wine excursions, often continuing the adventure together afterward.
C. Use Shared Spaces Like Hostel Common Areas to Start Conversations
Hostels are social hubs, not just budget accommodations. I found that their common areas and curated events — like communal dinners and happy hours designed specifically for solo travelers — created effortless meeting opportunities.
With this in mind, I’d look for hostels with an active events calendar or a dedicated solo-traveler page. These relaxed environments foster connections free of emotional baggage, making spontaneous plans and easy goodbyes feel completely natural.
Traveling Like a Local for a Richer Cultural Experience
Choose Local Transport Over Flights for Authentic Interactions
Whenever I skip the flight and jump on a regional train or local bus, my whole experience shifts. I’ve had the most unexpected conversations with locals simply by sharing a ride. These moments don’t happen in airport lounges.
- Take overnight trains to save money and time
- Ride local buses to see how everyday people live
- Rent a bicycle to explore neighborhoods at your own pace
Explore Local Food, Markets, and Nightlife with an Open Mind
My best meals abroad were never in tourist-facing restaurants. I follow the crowds — if locals are lining up for street food at 7 am, I’m joining that queue. Wandering through morning markets gives me a real sense of how a community breathes.
| Experience | Why It Matters |
|---|---|
| Street food stalls | Authentic flavors, local prices |
| Neighborhood markets | Real daily life on display |
| Local bars and cafes | Genuine connection opportunities |
Respect Local Laws, Customs, and Cultural Norms
Before arriving anywhere, I spend an hour researching basic customs — dress codes, greeting styles, dining etiquette. What feels casual to me might deeply offend someone else. I always:
- Dress modestly when visiting religious sites
- Learn a few phrases in the local language
- Observe before acting in unfamiliar social situations
Essential Safety Tips Every Solo Traveler Must Know
Keep Copies of All Important Identification Documents
I never leave home without digital and physical copies of my passport, visa, and travel insurance. I store digital copies in a secure cloud folder and keep paper copies separate from the originals. If the worst happens, recovery becomes far less stressful.
Inform Trusted Contacts of Your Itinerary and Whereabouts
Before every trip, I share my full itinerary with someone I trust. I also use the “Find My” app so loved ones can track my location in real time. When I’m heading somewhere new at night, I always let someone know when to expect me back — what I call a personal “float plan.”
Stay Aware of Your Surroundings and Avoid Risky Areas at Night
Situational awareness is my strongest defense. I keep my head up, headphones out, and phone hidden in crowded areas. At night, I avoid dimly lit bus stops and use ride-sharing apps instead of walking alone. I always wait indoors until my ride arrives.
Know Your Country’s Embassy Contact and Local Emergency Numbers
I research local emergency numbers before landing. I also enroll in the US Department of State’s Smart Traveler Enrollment Program (STEP), which sends safety updates and enables emergency contact — a simple step that provides enormous peace of mind.
From choosing the right destination and packing smart to finding the perfect accommodation, making meaningful connections, and staying safe, your first solo mindful travel experience is built on small, intentional steps. The most important thing I want you to take away from this guide is that solo travel isn’t about being fearless. It’s about moving forward even when you feel uncertain, and discovering just how capable you truly are.
If I could leave you with one piece of advice, it’s this: start small, trust yourself, and take the leap. You don’t have to have everything figured out before you go. The world is full of kind people, rich cultures, and unforgettable moments waiting for you — and none of that is reserved for any kind of traveler except the one willing to show up. So pick your destination, pack your bag, and go. You’ll come back knowing yourself a little better, and I promise, you’ll already be planning your next trip before you even land at home
For more soulful stories and mindful living insights, explore The Zen Blog — your space for travel reflections, wellness tips, and everyday calm.
.
✨ Subscribe to The Zen Journal for mindful travel tips, yoga flows, and wellness inspiration delivered weekly ✨